Pivot Door Installation Instructions

Unpacking your Entry Pivot System
Check to make sure your US Door & More package includes:
1-Your Pivot Door
2-Jamb Legs and Header (hardware & gasket attached)
3-Three Lengths of trims (optional)
4-Sill (hardware attached)
If you are expecting any of these parts and they are missing or damaged, STOP and contact US Door & More.

Preparing your Rough Opening
- Check the dimensions of the rough opening.
- The opening should be at least 1" wider than the net frame size plus any sidelites & 1/2" taller than the net frame size plus any transoms.
- Check that the floor beneath the sill is level.
- Check that the rough opening is plumb and square.
Your opening may look different than the figure depending on the door to be installed.

Installing your Entryway
Step 1: Constructing the Frame


Step 2: Inserting the Frame
- Apply silicone to the sub-floor beneath where the sill will sit.
- Check that the height of the interior flooring will sit beneath the sill.
- Lean the assembled frame into the rough opening, making sure the door will swing the appropriate way.
The door will swing towards the side that the hinges will be visible from. - Check that the sill is level.
- Lean the assembled frame into the rough opening, making sure the door will swing the appropriate way.
Your frame may look different than the figure depending on the door to be installed.

Step 3: Securing the Frame
Hammer shims between the frame and the rough opening until the frame is tightly installed.
Shims should be paired opposite one another on either side of the frame.
Check that the installed frame is plumb and level.

Step 4: Attaching the Frame
- Attach the frame to the rough opening with the appropriate screws (not provided) through the side jambs and the header.
- Be sure to screw through shims and fully into the rough opening.
- Remove the hinge rubbers from the hinges.
Screws affix the frame firmly into place - The amount and locations you need may vary.

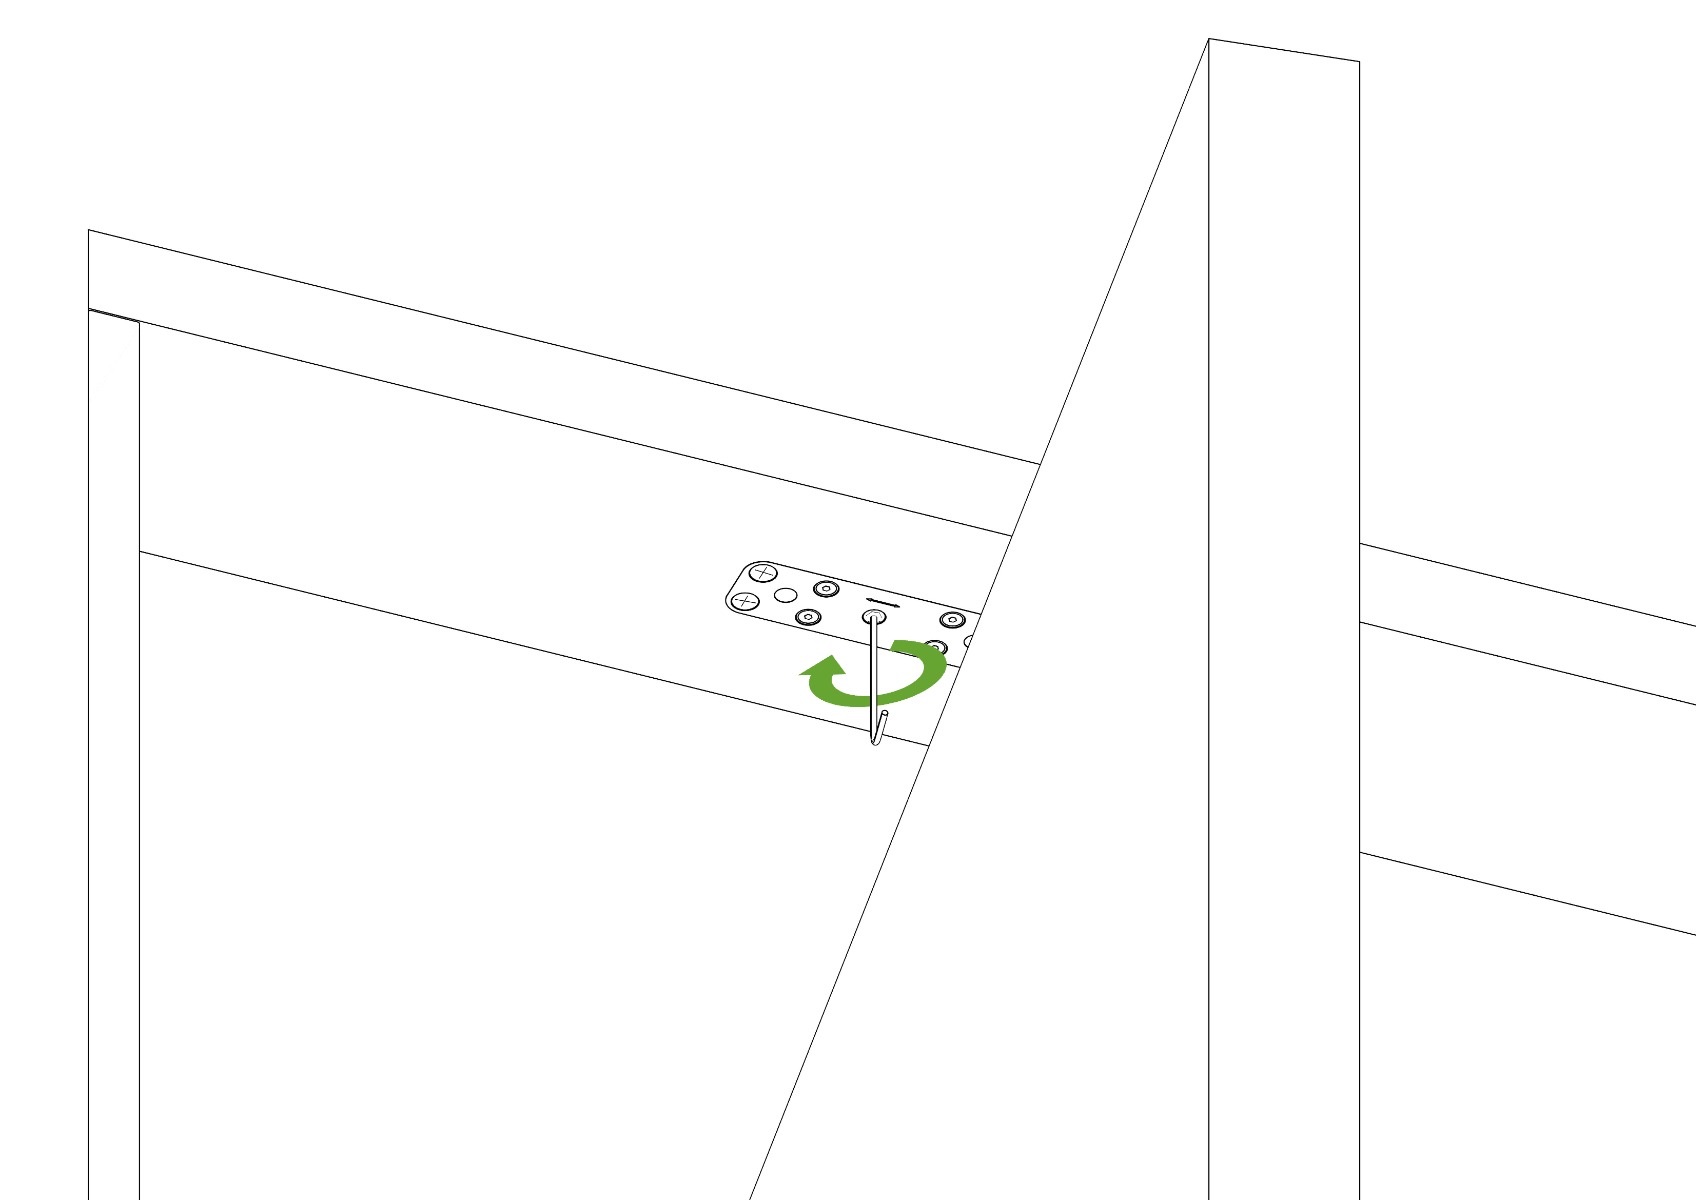
Step 5: Installing the Door


6-Finetune The Closing Seam


Step 7: Cutting the Brickmolding
- Identify the provided brickmolds.
- The two longer pieces will cover the gap between the side jamb and the rough opening.
- The shorter piece will cover the gap between the header and the rough opening.
- The two longer pieces will cover the gap between the side jamb and the rough opening.
- Using the height of the frame as reference, mark the desired height of he inner brickmold.
- With a speed square, scribe a 45° line from the previous mark out towards the extra material and cut along the drawn line.
- Repeat, mirrored, for the other long piece of brickmold.
- On the shorter brickmold, mark the corners of the width of the frame.
- With a speed square, scribe a 45° line from the previous marks towards the extra material and cut along the drawn line.

Step 8: Attaching the Brickmolding
- Affix both long pieces of brickmold to the external sides of the doorway with finishing nails and apply silicone to the joining faces.
- Make sure to cover the gap between the rough opening and the frame.
- Affix the shorter brickmold to the external top of the doorway with finishing nails and apply silicone to the joining faces.
- Make sure to cover the gap between the rough opening and the frame.
Your brickmold may look different than the figure depending on the door to be installed. Use as many finishing nails as needed to properly secure the brickmold.

Step 9: Cutting the Casing
- Identify the provided casing.
- The two longer pieces will cover the gap between the side jamp and the rough opening.
- The shorter piece will cover the gap between the header and the rough opening.
- The two longer pieces will cover the gap between the side jamp and the rough opening.
- Using the height of the frame as reference, mark the desired height of the casing across the piece and cut.
- Repeat, mirrored, for the other long piece of casing.
- On the shorter casing, mark the corners of the width of the frame across the piece and cut.

Step 10: Attaching the Casing
Affix both long pieces of casing to the internal sides of the doorway with finishing nails and apply silicone to the joining faces.
Make sure to cover the gap between the rough opening and the frame.
Affix the shorter casing to the internal top of the doorway with finishing nails and apply silicone to the joining faces.
Make sure to cover the gap between the rough opening and the frame.
Your casing may look different than the figure depending on the door to be installed. Use as many finishing nails as needed to properly secure the casing.


Mastering Pivot Doors:A Comprehensive Technical Overview
Discover the latest in pivot door hardware components.
Disclaimer: This installation guide does not cover all situations, variations, details, or scenarios concerned with the installation, operation, or maintenance of your entry system, nor does it claim to. These instructions are designed to provide general assistance in the installation of your entry system. Always consult a professional to ensure proper treatment for your door and your environment. Warranty available at www.doornmore.com.